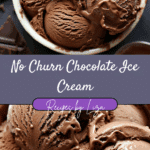
This no churn chocolate ice cream is rich, velvety, and deeply chocolatey—made completely without an ice cream machine. I love how it only takes a few ingredients and a simple method to whip up something so creamy and indulgent. By blooming the cocoa powder first, I unlock a deeper flavor that makes every bite smooth and satisfying, without any grainy texture.
Why You’ll Love This Recipe
I love how this recipe simplifies ice cream making without compromising flavor or texture. There’s no need for fancy equipment or egg-based custards. The cocoa powder is bloomed—just like in the best chocolate cakes—so it dissolves completely and delivers a true chocolate punch. The heavy cream is whipped for aeration, and the sweetened condensed milk keeps everything silky. It’s the easiest way I know to get scoopable, homemade chocolate ice cream straight from the freezer.
Ingredients
(Here’s a tip: Check out the full list of ingredients and measurements in the recipe card below.)
2 cups heavy whipping cream
1 (14 oz) can sweetened condensed milk
1/2 cup Dutch process cocoa powder
1/2 cup boiling water
1 teaspoon vanilla extract (optional)
Pinch of salt
Directions
Step 1: Bloom the cocoa
I start by combining the Dutch process cocoa powder with the boiling water in a mixing bowl. I whisk until it forms a smooth, glossy paste. This step blooms the cocoa, bringing out a rich, deep chocolate flavor that fully blends into the ice cream base.
Step 2: Mix in the condensed milk
Once the cocoa mixture cools slightly, I stir in the sweetened condensed milk, salt, and vanilla extract if I’m using it. This becomes the chocolate base of the ice cream.
Step 3: Whip the cream
In a separate bowl, I whip the heavy cream to medium-stiff peaks using a hand mixer. I stop once the cream holds its shape but still looks soft and smooth.
Step 4: Fold everything together
I gently fold the whipped cream into the chocolate mixture in batches, being careful not to deflate it. The goal here is to keep it airy so the ice cream stays soft and scoopable.
Step 5: Freeze
I transfer the mixture to a loaf pan or airtight container, smooth out the top, and press a piece of parchment directly onto the surface. Then I freeze it for at least 6 hours, or overnight for best results.
Servings and timing
This recipe makes about 1 quart of chocolate ice cream, which serves around 6 people. It takes 15 minutes to prepare and about 6 hours to freeze, making the total time approximately 6 hours and 15 minutes.
Variations
-
Chocolate chip: I sometimes fold in chopped dark chocolate or mini chocolate chips just before freezing for added texture.
-
Mocha swirl: A teaspoon of instant espresso mixed into the cocoa bloom gives it a subtle coffee twist.
-
Nutty crunch: Toasted pecans, almonds, or hazelnuts folded in make for a delicious crunch.
-
Spiced: A pinch of cinnamon or chili powder adds an unexpected kick to the chocolate base.
-
Mint chocolate: A few drops of peppermint extract turn this into a refreshing mint chocolate version.
Storage/Reheating
I store the ice cream in an airtight container in the freezer for up to 2 weeks. To keep it scoopable, I let it sit at room temperature for about 5-10 minutes before serving. Since this is ice cream, there’s no reheating involved—just thaw slightly and enjoy.
FAQs
Why do I need to bloom the cocoa powder?
Blooming the cocoa powder in boiling water helps dissolve it completely and intensifies the chocolate flavor. It also prevents that chalky or powdery texture in the finished ice cream.
Can I use regular cocoa powder instead of Dutch process?
Yes, but I find Dutch process cocoa gives a smoother, deeper chocolate flavor. Regular cocoa works, though it may be slightly more bitter.
Do I need to whip the cream to stiff peaks?
Medium to stiff peaks work best. I try not to overwhip—if it’s too stiff, it can be hard to fold into the base smoothly.
Can I make this ice cream vegan?
Yes, I’ve had success using coconut cream in place of heavy cream and sweetened condensed coconut milk instead of dairy. The texture changes slightly but it’s still delicious.
How long does it take to freeze completely?
I usually freeze the ice cream for at least 6 hours, but overnight gives the best, firm-but-scoopable texture.
Conclusion
No churn chocolate ice cream is one of my favorite dessert hacks—it’s luxurious, easy to make, and doesn’t require an ice cream maker. The blooming technique transforms the cocoa into a silky, bold base, and whipping the cream gives it that classic creamy texture. I always have a batch in my freezer, ready to scoop on a whim.
PrintNo Churn Chocolate Ice Cream
5 Stars 4 Stars 3 Stars 2 Stars 1 Star
No reviews
This no churn chocolate ice cream is ultra-creamy, rich, and deeply chocolatey—all without an ice cream maker. With just a few ingredients and the key step of blooming cocoa powder, this homemade chocolate ice cream delivers a smooth, indulgent texture and bold flavor. The perfect frozen treat for any chocolate lover!
- Author: Lizaa
- Prep Time: 15 minutes
- Cook Time: 0 minutes
- Total Time: 6 hours 15 minutes
- Yield: About 1 quart (serves 6)
- Category: Dessert, Frozen Treats
- Method: No Churn, Freezer
- Cuisine: American
- Diet: Vegetarian
Ingredients
- 2 cups heavy whipping cream
- 1 (14 oz) can sweetened condensed milk
- 1/2 cup Dutch process cocoa powder
- 1/2 cup boiling water
- 1 teaspoon vanilla extract (optional)
- Pinch of salt
Instructions
- In a mixing bowl, whisk the cocoa powder with boiling water until smooth and glossy. Let it cool slightly.
- Stir in sweetened condensed milk, salt, and vanilla extract (if using) into the cocoa mixture.
- In a separate bowl, whip heavy cream to medium-stiff peaks.
- Gently fold the whipped cream into the chocolate base in batches, keeping the mixture light and airy.
- Pour into a loaf pan or airtight container, smooth the top, and press parchment on the surface. Freeze for at least 6 hours or overnight.
Notes
- Dutch process cocoa creates a smoother, richer chocolate flavor, but regular cocoa can be used.
- Let ice cream sit at room temperature for 5–10 minutes before scooping.
- For a vegan version, use coconut cream and sweetened condensed coconut milk.
- Fold in extras like chopped nuts, chocolate chips, or flavor extracts before freezing.
Nutrition
- Serving Size: 1/2 cup
- Calories: 340
- Sugar: 28g
- Sodium: 90mg
- Fat: 22g
- Saturated Fat: 14g
- Unsaturated Fat: 6g
- Trans Fat: 0g
- Carbohydrates: 30g
- Fiber: 2g
- Protein: 5g
- Cholesterol: 70mg


