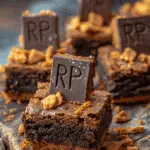
These RIP Brownies are my go-to for Halloween fun—equal parts creepy and cute. Using simple store-bought ingredients like Milano cookies and candy pumpkins, I turn ordinary brownies into edible little graveyards that never fail to impress. Whether it’s for a party or just a fun treat at home, these spooky brownies are always a hit.
Why You’ll Love This Recipe
I love how easy and festive these RIP Brownies are. They require minimal effort but have maximum visual impact. Since I can use a brownie mix or my favorite homemade recipe, they’re super adaptable. Plus, decorating them is genuinely fun—perfect for getting kids involved or showing off some Halloween creativity.
Ingredients
(Here’s a tip: Check out the full list of ingredients and measurements in the recipe card below.)
- Baked brownies (use a homemade recipe or box mix)
- Milano cookies
- Black decorating gel
- Candy pumpkins
- Green buttercream frosting
Directions
- I start by preparing and baking brownies in an 8×8” pan. I always line the pan with parchment paper so I can lift the brownies out easily once they’re cool.
- While the brownies are baking or cooling, I write “R-I-P” on the top half of each Milano cookie using black decorating gel. It helps to let them dry a bit before handling.
- Once the brownies are completely cool, I cut them into squares. Then I gently press a decorated Milano cookie into the top edge of each brownie square to serve as the headstone. If the cookies are too tall, I just trim the bottoms a little with a sharp knife.
- To finish, I place a small amount of green buttercream frosting on the bottom of each candy pumpkin and stick them near the cookie headstones for a fun and spooky look.
Servings and timing
This recipe makes about 9 to 12 decorated brownies, depending on how large I cut the squares. From start to finish, it takes around 45 minutes total—30 minutes to bake the brownies and 15 minutes to decorate once cooled.
Variations
- I sometimes crumble chocolate cookies or Oreo crumbs around the base for a “dirt” effect.
- For extra fun, I’ve used gummy worms poking out from the brownie “graves.”
- If I want to make a larger batch, I double the recipe and use a 9×13” pan.
- For a nutty twist, I like to add chopped walnuts or pecans to the brownie batter.
- I occasionally tint some shredded coconut green and use it as “grass” instead of frosting.
Storage/Reheating
I keep these brownies in an airtight container at room temperature for up to 3 days. If I need them to last longer, I refrigerate them for up to 5 days. To keep the decorations looking fresh, I avoid stacking them. If I want to reheat a brownie square, I remove the cookie and candy, warm it briefly in the microwave, and then replace the decorations.
FAQs
How far in advance can I make these brownies?
I like to bake the brownies a day ahead and decorate them the day of serving for the best texture and appearance.
Can I freeze these decorated brownies?
I prefer not to freeze them once decorated because the cookies and candy can get soft, but I can freeze the undecorated brownies and decorate after thawing.
What kind of brownies work best?
Any sturdy brownie recipe works great—fudgy or cakey, it’s up to personal preference. I usually use my favorite homemade fudgy brownie recipe.
Can I use something else instead of Milano cookies?
Yes, I sometimes use rectangular graham crackers or shortbread cookies if Milano cookies aren’t available.
How do I keep the cookie headstones from falling over?
I make sure the brownies are completely cool before inserting the cookies and sometimes trim the bottoms flat so they sit securely in the brownie.
Conclusion
These RIP Brownies are a Halloween must-have for me. They’re festive, easy, and delicious, and they always get compliments. Whether I’m hosting a party or just celebrating the season with family, these treats bring spooky charm to any table.
PrintRIP Brownies: Spooky & Sweet Graveyard Halloween Treats
These RIP Brownies are festive Halloween treats made with brownies, Milano cookies, and candy decorations to create edible graveyards. They’re easy to make and always a spooky hit at parties or family gatherings.
- Prep Time: 15 minutes
- Cook Time: 30 minutes
- Total Time: 45 minutes
- Yield: 9 to 12 brownies
- Category: Dessert
- Method: Baking
- Cuisine: American
- Diet: Vegetarian
Ingredients
- 1 batch of baked brownies (homemade or box mix)
- 9–12 Milano cookies
- Black decorating gel
- 9–12 candy pumpkins
- Green buttercream frosting
Instructions
- Prepare and bake brownies in an 8×8” pan, lined with parchment paper for easy removal.
- While brownies bake or cool, write “R-I-P” on the top half of each Milano cookie using black decorating gel. Let them dry.
- Once brownies are completely cool, cut them into 9 to 12 squares.
- Gently press a decorated Milano cookie into the top edge of each brownie square to act as the headstone. Trim cookie bottoms if necessary for stability.
- Place a small amount of green buttercream frosting on the bottom of each candy pumpkin and stick them near the cookie headstones.
Notes
- Add crushed Oreos or chocolate cookies for a “dirt” effect.
- Gummy worms make a fun, spooky addition.
- Doubles well in a 9×13” pan for more servings.
- Chopped nuts can be added to the brownie batter for extra flavor.
- Tinted shredded coconut can substitute for green frosting as “grass.”
Nutrition
- Serving Size: 1 brownie
- Calories: 280
- Sugar: 22g
- Sodium: 120mg
- Fat: 14g
- Saturated Fat: 7g
- Unsaturated Fat: 6g
- Trans Fat: 0g
- Carbohydrates: 36g
- Fiber: 1g
- Protein: 2g
- Cholesterol: 25mg

